Figure 1. How to release the
 lever from the bars
The bolt to release the Brompton brake levers from the handlebars is actually inside the lever itself. You have to squeeze the lever and slip a 4mm allen key in through the gap where the brake cable sits (see: Figure 1).
It's worth noting here that the barrel adjuster on the Brompton lever is different to "normal" levers. Normal levers have a split in them to allow the cable to be removed without having to undo the cable at the opposite end and pull it through...(See: Figure 2)
 Figure 2. The unusual Brompton barrel adjuster
So, you have to undo the bolt which holds the brake cable to the brake caliper allowing the brake cable to be removed all the way through the barrel adjuster. You may also have to snip off the cable cap on the end of the cable. If you have to do this, ensure you are going to have enough cable left to setup your brakes when it comes to putting everything back together.
Thread the cable through the cable outer, making sure that all frame mounted routings are used and that the cable follows the same path as previously. If you take a new route, it may affect the fold. It's also worth squirting a dash of GT-85 down the cable outers just to keep the action smooth and to displace any trapped water.
Feed the brake cable onto the lever and ensure that all of the cable outers are seated into their fittings.
Re bolt the cable to the brake caliper and squeeze on a cable cap.
Now all you have to do is make sure that the brake pads are sat equidistant from the rim on each side. If not, lightly loosen the bolt which holds the caliper onto the frame and adjust the pads accordingly. Make sure you hold the caliper when tightening, else it'll just spin back to how it was!
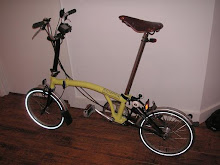
So that's it, the only concern I have now is that somehow due to the increased power that something will give up and snap off. I have never had an issue with Brompton brakes previously and I think the calipers work excellently. This was not an adjustment due to necessity! Here's the finished article:

The image doesn't really do it justice, the levers do look remarkably fitting, with the added bonus that the brakes have become binary brakes!
If you follow my instructions, do so at your own peril, I can't be held responsible if anything bad happens!

No comments:
Post a Comment